Installation
Uploading via WordPress Dashboard
- Navigate to the ‘Add New’ in the plugins dashboard
- Navigate to the ‘Upload’ area
- Select wp-links-page.zip from your computer
- Click ‘Install Now’
- Activate the plugin in the Plugin dashboard
Using FTP
- Download wp-links-page.zip
- Extract the wp-links-page.zip directory to your computer
- Upload the wp-links-page.zip directory to the
/wp-content/plugins/directory - Activate the plugin in the Plugin dashboard
Settings
On the ‘Settings’ page you have various options for your Links.
The Screenshot size option allows you to choose which size of screenshot to retrieve. This is actually a choice between two different screenshot API’s to use. The 500px Width uses a Google API and has better quality screenshots. However, the images are smaller and it usually requires an API key to work properly. The 1200px Width uses a WordPress API that does not require an API key, but sometimes doesn’t fetch screenshots properly for every website.
Input field for a Google PageSpeed Insights API Key. If you are having trouble updating we suggest using this feature. This API Key is only for use with the 500px width images.
The Default Favicon field is used when you are displaying links with their favicon image, but a certain link didn’t import a favicon. By setting the default image here, this image will display instead of having an empty slot in your display.
The screenshot refresh rate is how often to generate new screenshots. The options are: Never, Daily, Every two days, Weekly, Every two Weeks, Monthly.
The Import Links feature allows you to import links from any comma separated list of urls. Simply paste your list of links into the ‘Links’ textarea, add a category if you want, and then press ‘Import’ at the bottom of the page. A progress bar will display, and when finished import it will notify you of any errors or if all links were imported successfully

Adding and Editing Links
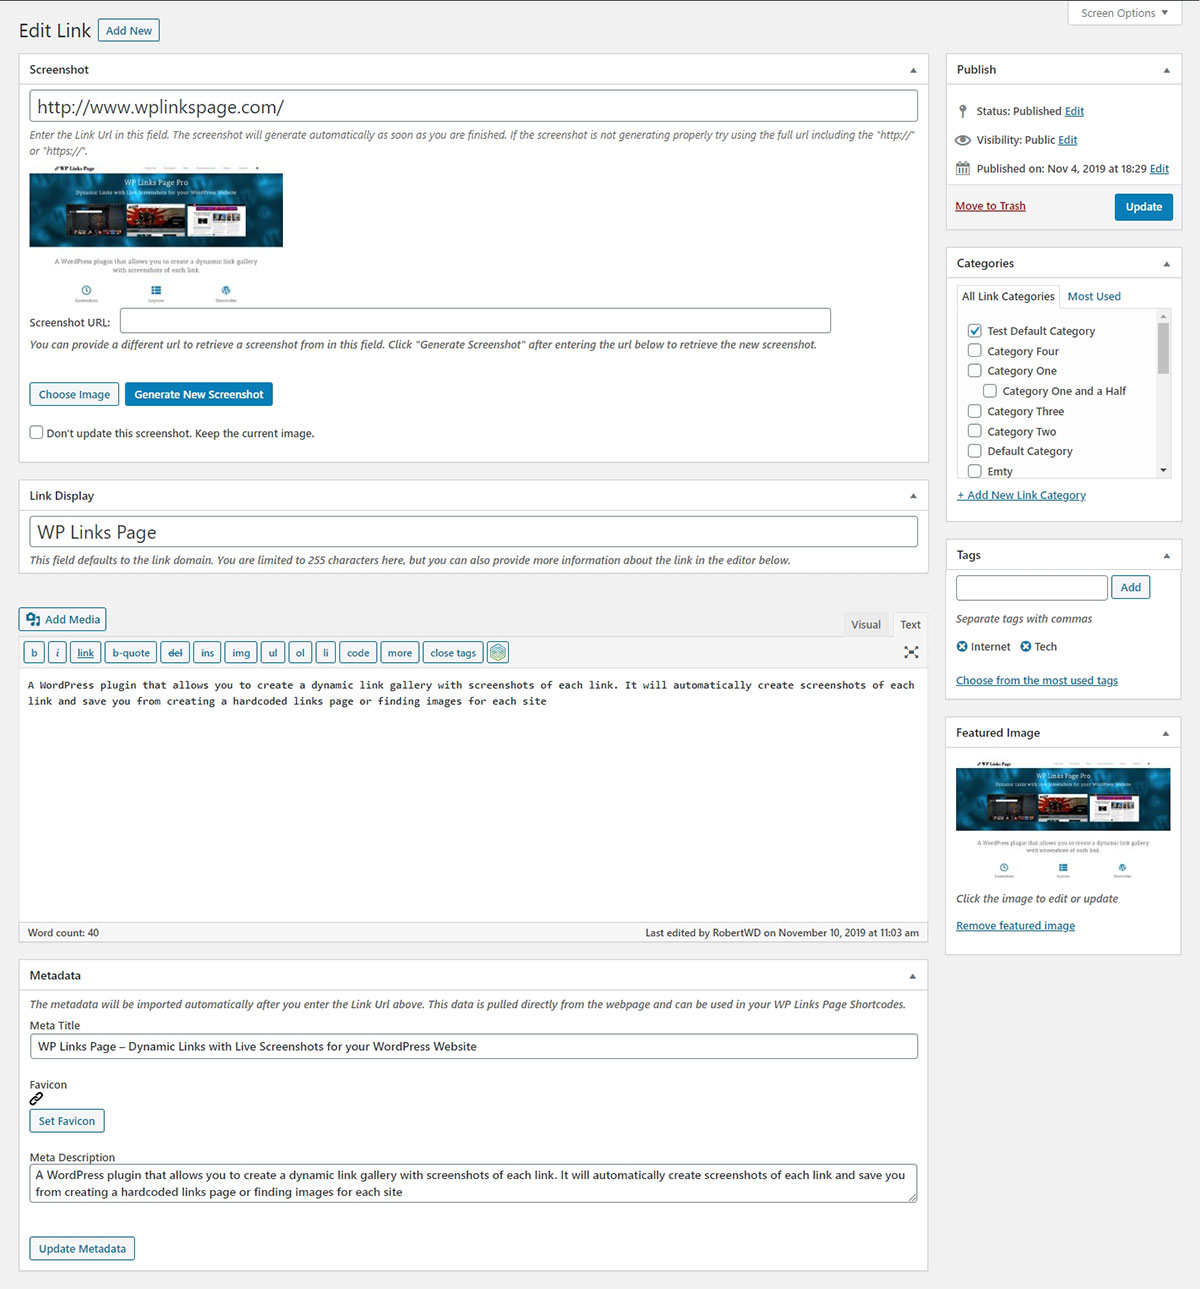
Visit the WP Links Page section of the dashboard to add and edit the links.
Click the Add New Link button or menu item to get started.
Adding a link is much like adding a Post.
When adding a link, as soon as you finish entering the Link Url and then move out of that field, the screenshot and metadata will populate automatically for you. You can enter the description and add categories and tags as well.
If you wish to pull the screenshot from one url but have the link go to a different address, as is the case with most affiliate links, enter the url you wish the screenshot to come from in the ‘Screenshot Url’ field and click ‘Generate Screenshot’.
Sometimes WP Links Page cannot retrieve a screenshot because a website is built with flash, has a slow loading time, or for other reasons. If you should need to use your own image instead of the automatic screenshot WP Links Page generates, simply click ‘Choose Image’ in the Screenshot box on the add/edit link screen and choose a new image from the media library. Should you wish to return to using a screenshot simply click ‘Generate New Screenshot’ which is next to ‘Choose Image’.
For the same reasons WP Links Page may not be able to fetch a favicon for your url. The process is similar to use your own image for a favicon. Simply click ‘Set Favicon’ in the Metadata box to choose a new image from the media library, and to try to retrieve the favicon again click ‘Update Metadata’ at the bottom of the same Metadata box. The ‘Update Metadata’ button will also fetch the Meta Title and Meta Description. This data does not automatically get updated as it rarely changes.
You can add categories, tags, and featured images to your links in the same way you would add them to a stardard WordPress post.
To edit your links simply click the edit link inside the “All Links” page as you would with regular posts. You will be brought to the same form you used when adding your link originally. Make any changes and then click Update to save them.
All Links
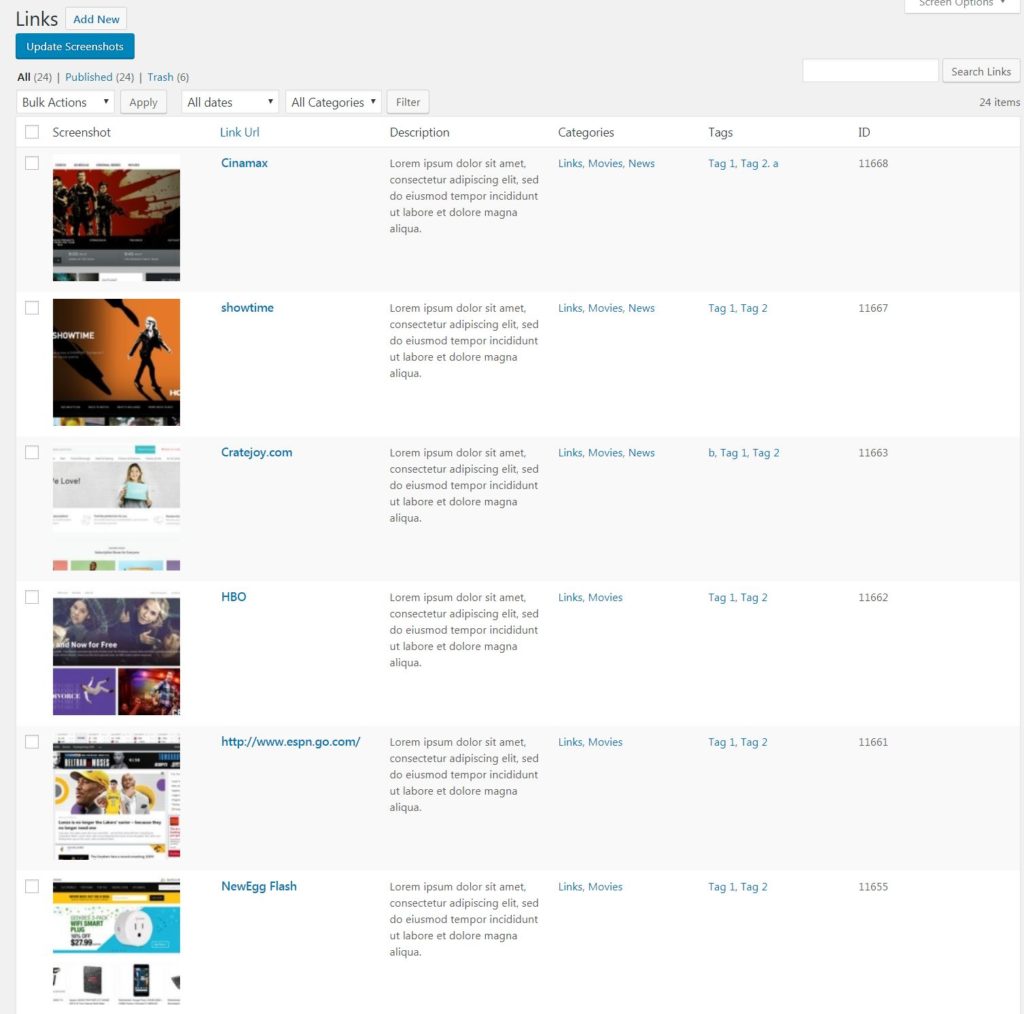
On the ‘All Links’ page you can view all of the links you have on your site.
The links are sorted by their ID and should appear with the newest links first going to the oldest links.
You can change the sort with filters at the top of this page, and even search for a particlular link that you need to edit.
With the quick edit you can change the link url, link display, description, categories, order, tags, and status or each link easily.
To bulk edit your links, check the boxes next to each link you wish to edit, and then choose ‘Edit’ from the Bulk Actions dropdown and click ‘Apply’. Here you can edit categories and tags on many links at once.
Clicking the ‘Update Screenshots’ button on the ‘All Links’ page can take several minutes depending on your connection and the amount of links you have. Please be patient while it retrieves new images. A progress bar will display to show you how much longer you may need to wait.
Shortcode Builder
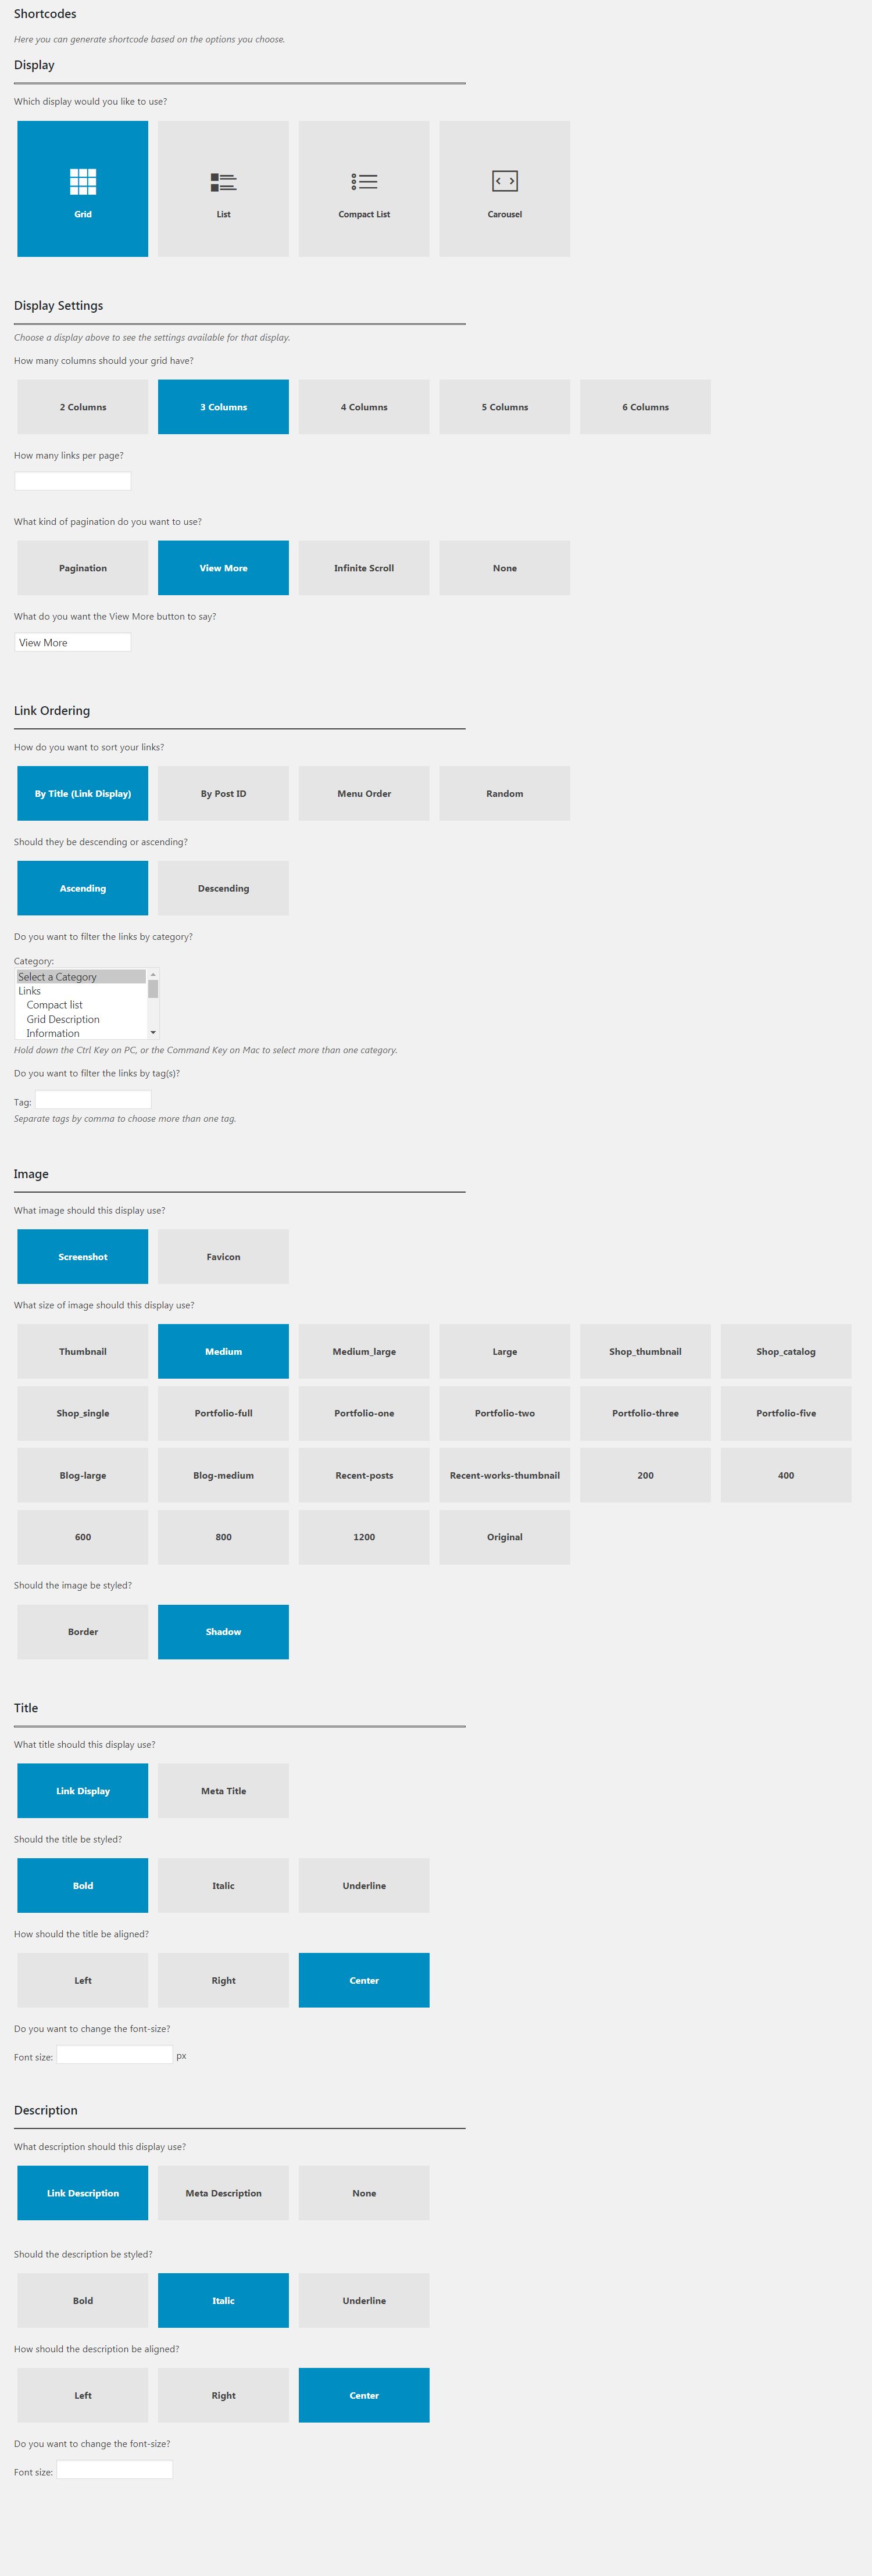
Visit the ‘Shortcode’ page in the WP Links Page section to create the right shortcode for your desired display.
You do not need to select all options, only the options you desire. The shortcode will display using default options for all the choices you do not select.
In the Display section you will choose which kind of display your links should have: Grid, List, Compact List, or Carousel.
The Display Settings section will not show up until you have chosen a display, since each display has its own set of options such as the number of columns for the grid, or the number of slides to show in the carousel.
To select more than one category, simply hold down the ‘Ctrl’ key for PC keyboards or the ‘Command’ key on Mack and click each category you want to include. To select more than one tag, simply separate your tags by commas in the ‘Tag’ textbox.
In the Image, Title, and Description sections you can decide which data to use, and how to display it. The images sizes are automatically pulled from your version of wordpress, and often your theme will create extra image sizes to use. The shortcode will automatically default to ‘Medium’, but you may prefer a different size. Again, you do not need to choose any options here, the display will use it’s defaults.
As you choose options on this page your shortcode will appear at the bottom of the page. This shortcode will not remain after you leave the page. Please copy and paste your shortcode before you exit the page to avoid having to build your display again.
These are the available options for the WP Links Page shortcode:
- ‘ids’ – You can enter any ID or comma separated list of IDs here to only display specific links. The ids are listed on the ‘All Links’ page in the last column of each link. The default for this field is blank. Ex: ids=”1,2,3″
- ‘display’ – This is used for each display type. The options are ‘grid’, ‘list’, ‘compactlist’, and ‘carousel’. The default for this field is ‘grid’. Ex: display=”grid”
- ‘cols’ – This is the number of columns your grid should have. You can enter any number into this field, but 2, 3, 4, 5, and 6 are recommended. The default for this field is ‘3’. Ex: cols=”3″
- ‘slides’ – This is the number of slides to show at a time in the carousel. You can enter any number into this field. The default for this field is ‘3’. Ex: slides=”3″
- ‘slide_scroll’ – This is the number of slides to scroll at a time when clicking the next button on the carousel. You can set this to any number or ‘all’ which will scroll the same number as the slides option. The default for this field is ‘1’. Ex: slide_scroll=”1″
- ‘autoplay’ – This is whether to automatically scroll the carousel. The options are ‘true’ to let the carousel scroll on load, or ‘false’ to only scroll when clicked. This defaults to ‘true’. Ex: autoplay=”true”
- ‘infinite’ – THis is whether or not to loop the slides in the carousel. The options are ‘true’ to restart the slides after the end, or ‘false’ to end the carousel with the last slide. This defaults to ‘true’. Ex: infinite=”true”
- ‘pager’ – This selects the type of pager to use for your links if you have too many to show on one page. The options are “pagination” to use standard page numbers as in WordPress, “view_more” to add a View More button at the end of your links which will load more links, “infinite” to automatically load more links as soon as the visitor scrolls to the bottom of the page, and to leave it blank for no pager. The default for this field is ‘pagination’. Ex: pager=”pagination”
- ‘load_more’ – This is used as the text in the View More button at the end of the ‘view_more’ pager. The default is ‘Load More’. Ex: load_more=”Load More”
- ‘num’ – This is the number of links to display. If you are using a pager, this means per page. To show all links without a pager use ‘all’. The default will use the ‘Blog pages allow at most’ option, found in Settings > Reading, as the number per page for List and Compact List, and the number of rows per page for Grid. Carousel does not use a pager and will be limited to this setting by default. Ex: num=”30″
- ‘orderby’ – This is used to sort the links differently. This accepts most common WP_Query orderby arguments which can be found here. The only exception is if you want to sort by the url of your link use ‘post_title’ in this field, and ‘title’ for Link Display. This field defaults to ‘ID’. Ex: orderby=”ID”
- ‘order’ – This is whether to sort ascending ‘ASC’ or descending ‘DESC’. The default is ‘DESC’. Ex: order=”DESC”
- ‘cat’ – This will let you display only those links contained in specific categories. You will need to enter the category ids here for it to work properly. This is blank by default. Ex: cat=”3,23,32″
- ‘tag’ – This will let you display only links that have a certain tag. You can enter tag ids. This is blank by default. Ex: tag=”45,46″
- ‘image’ – This decides which image to use in your display. The options are ‘ss’ for screenshot, or ‘fav’ for favicon. This field defaults to ‘ss’. Ex: image=”ss”
- ‘img_size’ – This is what size of image to use in your display. The options vary from site to site, but the default, ‘medium’, is one of the standard wordpress sizes. For a full list of your image sizes available visit the ‘Shortcode’ page. Ex: img_size=”medium”
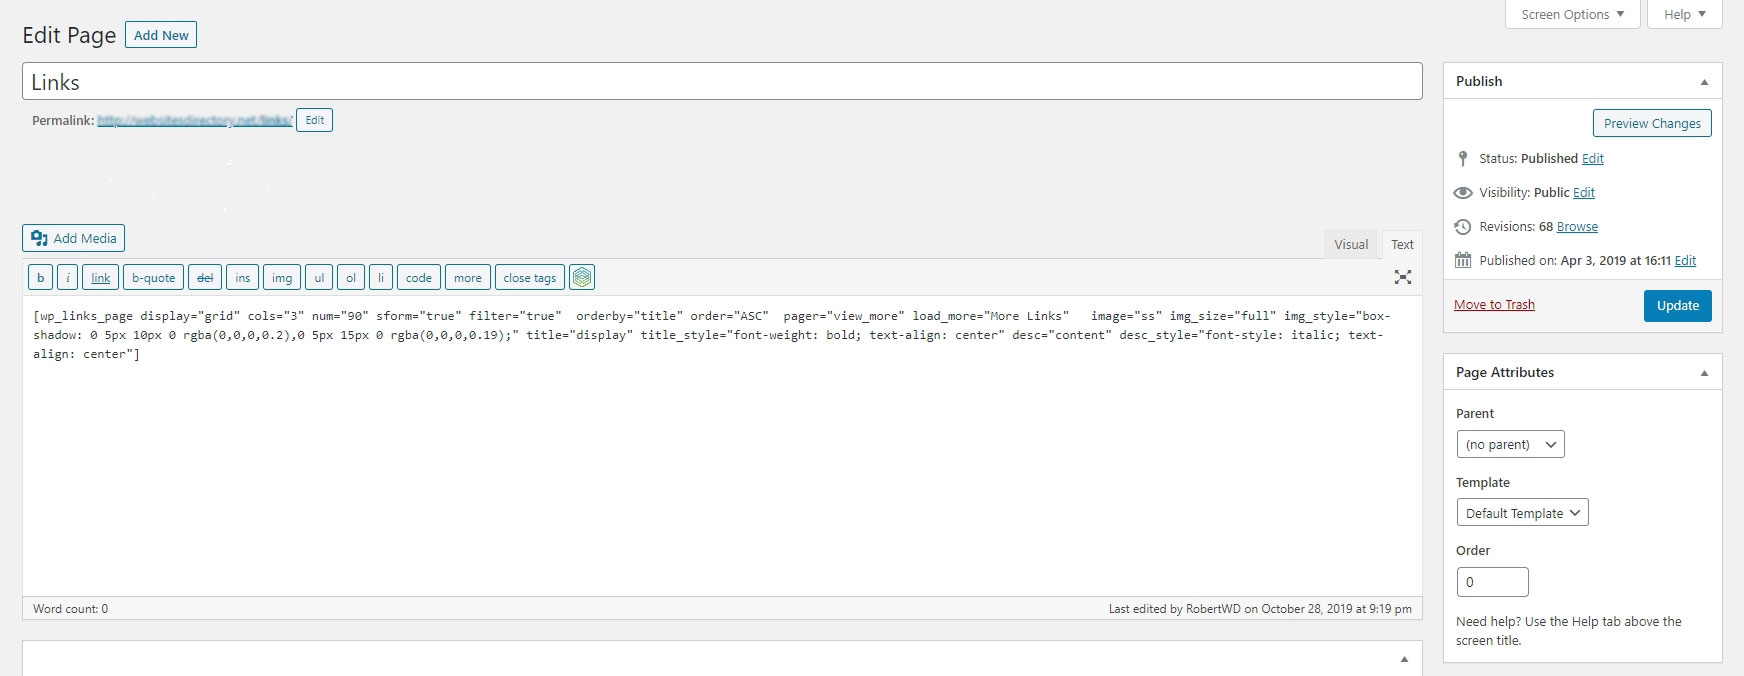
- ‘img_style’ – This field will add css to the images. You can place any valid CSS here and it will be applied to your image. This is blank by default. Ex: img_style=”box-shadow: 0 5px 10px 0 rgba(0,0,0,0.2),0 5px 15px 0 rgba(0,0,0,0.19);”
- ‘title’ – This lets you choose which title to use in your display. Your options are either ‘display’ which is the Link Display, or ‘meta’ which is the Meta Title. This defaults to ‘display’. Ex: title=”display”
- ‘title_style’ – This field will add css to the titles. You can place any valid CSS here and it will be applied to your title. This is blank by default. Ex: title_style=”font-color: #ccc;”
- ‘desc’ – This lets you choose which description to use in your display. Your options are either ‘content’ which is the Description, or ‘meta’ which is the Meta Description. You can also use ‘none’ or simply leave this field blank to display no description. This defaults to ‘none’. Ex: desc=”content”
- ‘desc_style’ – This field will add css to the descriptions. You can place any valid CSS here and it will be applied to your description. This is blank by default. Ex: desc_style=”font-style: italic;”

Styling the Links
You may find you want to change something with your links that the shortcode options cannot change for you. In these situations you will need to add your own CSS either in your theme or on the page/post inside style tags. For your reference we have some examples and the CSS classes you will need.

Frontend Link Submission
DEVELOPER VERSION ONLY
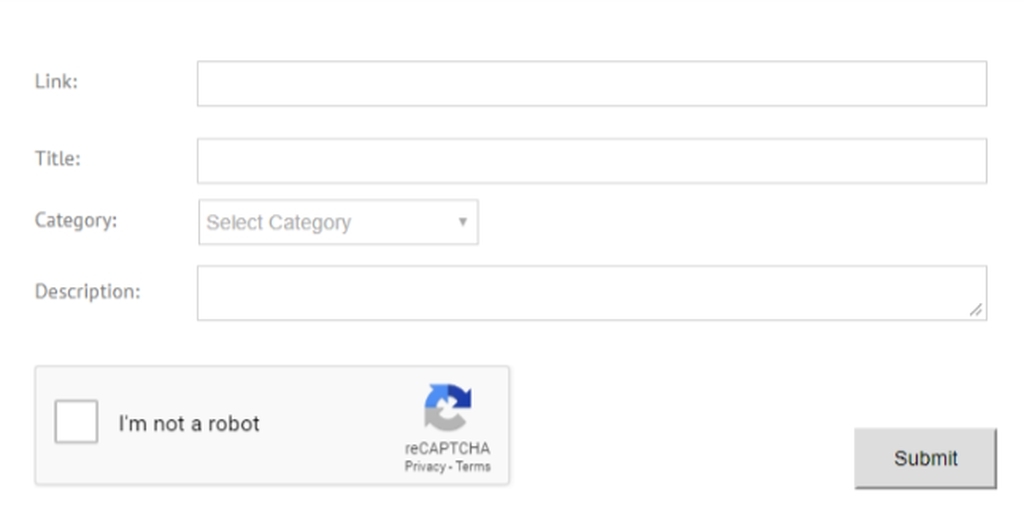
With the frontend form submission shortcode, you can place a form on your website for visitors to upload their own links.
The shortcode for this form is wp_links_form
The form has most of its options completed by visiting the ‘Settings’ Page , but the sitewide options can be overridden for price and category.
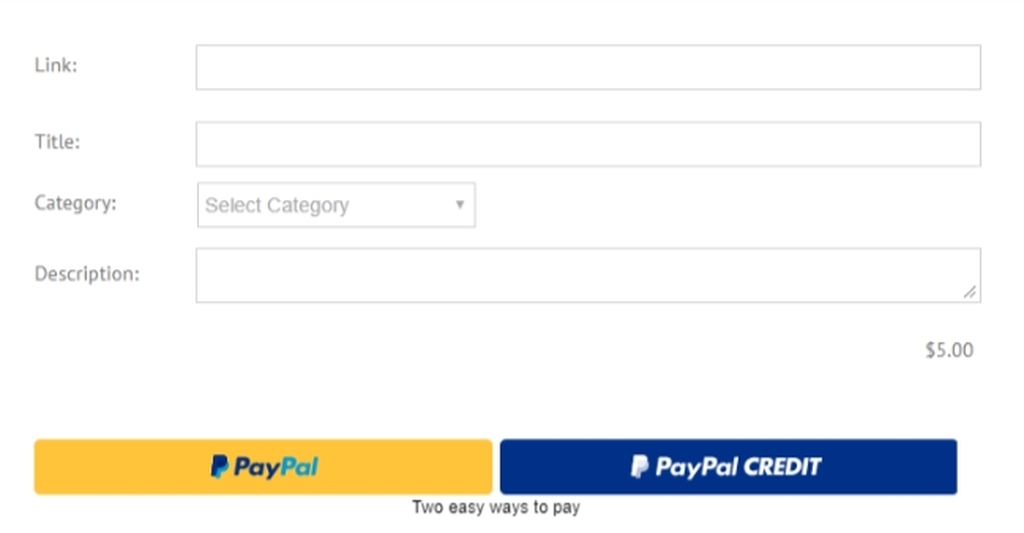
For example, you can use the following shortcode to set all links submitted in this form to the “Technology” category for “$20.00”:
wp_links_form category=”Technology” price=”$20.00″
Your website visitors can then use this form to publish a link to their own website in the Technology category for a $20.00 charge through PayPal.
The form also supports Google Recaptcha to prevent spam and setting all links to ‘Draft’ so that you can review each submitted link prior to publishing.
Dropdowns And Search
DEVELOPER VERSION ONLY
- ‘filter’ – This option will display options to filter the links on the front end. The links can be filtered by Category, Tag, or the sort order can be changed. The filter is not available with carousel or the infinite pager options. The options for the filter are true or false. Ex: filter=”true”
- ‘sform’ – This option will display a search form on the front end to allow visitors to search your links. The search feature is not available with carousel or the infinite pager options. The options for the search form are true or false. Ex: sform=”true”

